Notes and Mods on my 7×10 Mini Lathe
7×10 Cam Lock TailStock Mod
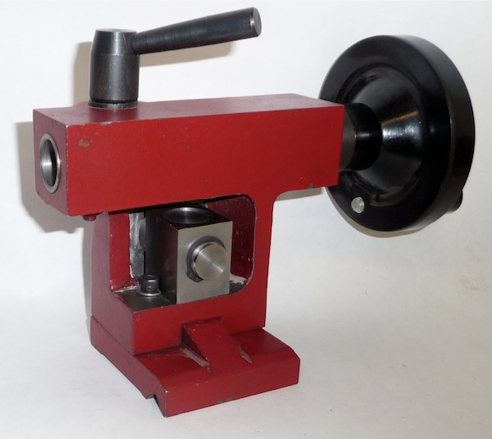
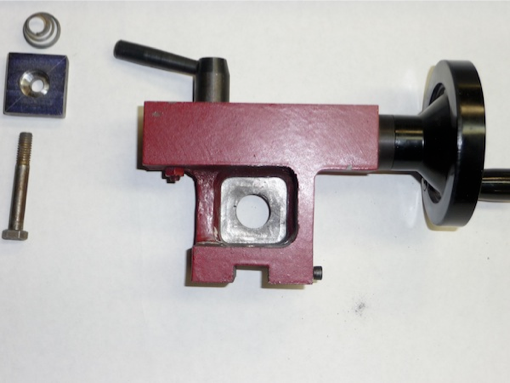 The first order of business was to mill the tailstock casting to accept the cam lock. As the back side of the casting is angled I chose to mill the recess of the casting to accept a bushing for the handle to rotate on. This side of the casting was also square with the bottom so when I put it in the vise I indicated off of the top to get it close. The hole was centered and drilled. I also squared up the bottom of the casting for the cam lock body to rest on. No measurements were taken other than centering the hole. The hole is a little over 3/4 which was sized based on the material on hand used for the bushing.
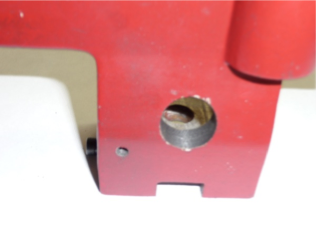
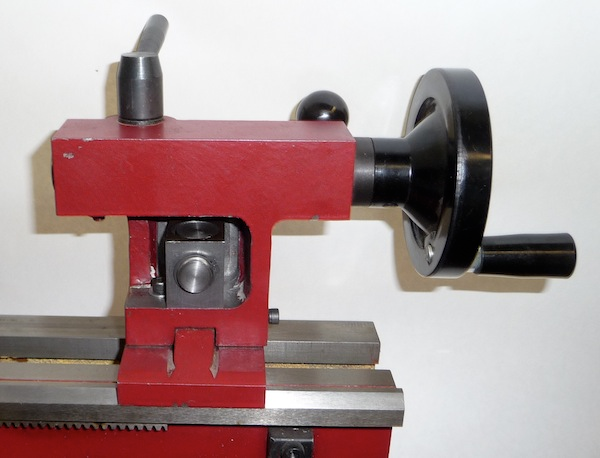
A view of the hole from the back tappered side. The small hole in the lower left is for a stop to keep the cam lock lever from resting on the lathe bed.
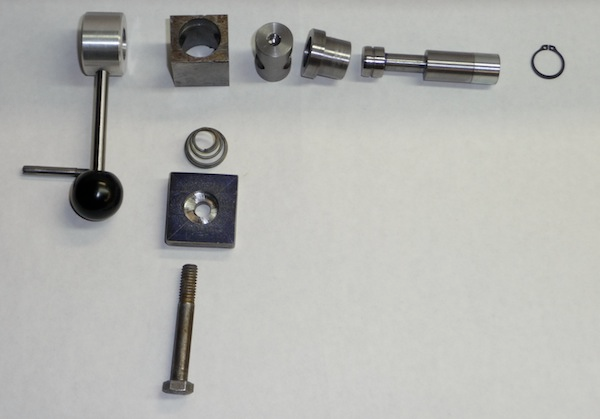
Turned from aluminum I had on hand. One side is drilled out 5/8 to match the cam. The handle is 1/4 inch drill rod threaded 1/4 20 on each end. A store purchased plastic ball that was on hand is used.
Cam Housing:
The square cam housing has a 5/8’s inch through hole centered to match the hole in the tail stock casting. I did not take a photo of this setup, but when I made the round bushing to fit the tailstock I drilled a 1/4 inch hole in it first. Removed it from the lathe and installed it in the casting. This allowed me to center punch the cam housing. The block was then put in the mill and the hole was opened up to 5/8’s.
The larger hole in the cam housing is 7/8’s and the cam piston which is 3/4 with a 5/8’s inch hole drilled through for the cam to ride on.
Cam Piston:
The cam piston is 3/4 inch with a 5/8 inch hole drilled through. This allows the cam to be slipped through. The smaller section of the cam rides on the top of this hole to lock down the tail stock. The bottom of the cam piston is drilled and threaded 5/16-18 to accept the bolt
Tail Stock Bushing:
The tail stock bushing is a loose slip fit into the hole in the tailstock. This supports the cam, as well as serving as a spacer for the cam housing. Turn to match the hole in the tailstock. Length should allow the handle to clear the tailstock casting without rubbing.
Cam:
The cam is 5/8’s with the cam section offset by turning with a 1/8 inch shim of aluminum between it and one of the jaws of the 3 jaw chuck. Nothing here is critical, we are looking for a loose fit in the housing and enough length to attach the handle. The end opposite of the handle I cut a small grove for a snap ring to secure the cam in place. Note: The cam in the photo is actual pictured backwards to how it fits in the assembly. I did not notice it until after the photo was taken.
Tailstock Nut:
The tailstock nut was drilled to allow the 5/16 bolt to pass through. I had to counter sink it a bit to allow the head of the bolt to clear the lathe bed casting. All corners are rounded slightly to allow it to slide smoothly when installed on the lathe.
Stop Pin:
The stop pin is 3./16 drill rod threaded 10-32 on one end,, A slot cut in the other end allows tightening with a screw driver. Its only fuction is to keep the handle from laying on the lathe bed when the tailstock cam is not engaged.
Spring:
A small spring was added to keep the nut clear when sliding the tailstock into position.
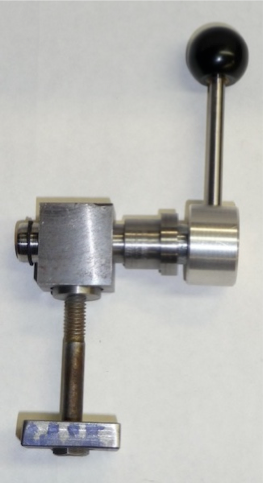
All The Parts Assembled
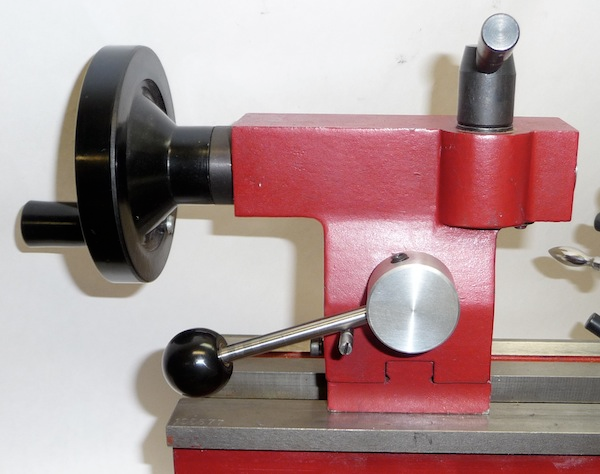
I am very happy with the result, it has proven to have been a reliable and usefull modification to the 7×10 mini lathe.
